Controlling Heat Movement
Heating and cooling costs can be slashed by up to 30% per year by properly sealing and having adequate attic insulation in the home. Insulating the attic should be a top priority for preventing heat loss because during cool seasons, as heat rises, a critical amount of heat loss from the living areas of the home occurs through an unfinished attic. During the summer months, heat trapped in the attic can reduce the home’s ability to keep cool, forcing the home’s cooling system to work overtime.
What to Check
As home inspectors we often see the lack of adequate ventilation in insulated attics is a common problem. Ensuring that there is a free flow of outside air from the soffits to the roof vents is key to a well-functioning insulation system. Look behind the baffles to see if there is any misplaced insulation obstructing the natural air flow, and check the roof vents to make sure that outside air is exhausting properly. Also, look for spots where the insulation is compacted; it may need to be fluffed out. If loose-fill insulation is installed, check for any thinly spread areas that may need topping up. Finally, look for dark spots in the insulation where incoming air is admitting wind-blown dust and moisture into the material. Any unintended openings or holes caused by weathering or pest damage should be repaired first.
Installing Attic Insulation
The objective in an attic insulation project is to insulate the living space of the house while allowing the roof to retain the same temperature as the outdoors. This prevents cold outside air from traveling through the attic and into the living area of the home. In order to accomplish this, an adequate venting system must be in place to vent the roof by allowing air flow to enter through soffit-intake vents and out through ridge vents, gable vents or louver vents.
If there is currently a floor in the attic, it will be necessary to pull up pieces of the floor to install the insulation. In this case, it will be easier to use a blower and loose-fill insulation to effectively fill the spaces between the joists. If you choose to go with blown-in insulation, you can usually get free use of a blower when you purchase a certain amount of insulation.
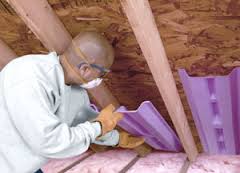
When installing fiberglass insulation, make sure that you wear personal protective equipment, including a hat, gloves, goggles and a face mask, as stray fiberglass material can become airborne, which can cause irritation to the lungs, eyes and exposed skin.
The process
Before you begin actually installing the insulation, there is some important preparation involved in order to ensure that the insulation is applied properly to prevent hazards and to achieve maximum effectiveness.
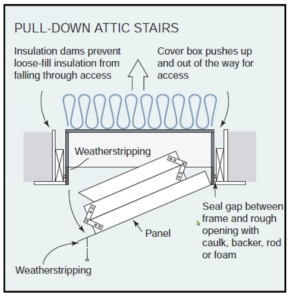
Step 1: Install Roof Baffles
Install polystyrene or plastic roof baffles where the joists meet the rafters order to maintain the free flow of outside air.
Step 2: Place Baffles Around Electrical Fixtures
Next, place baffles around any electrical fixtures (lights, electrical receptacles, etc.), since these may become hot while in use. Hold the baffles in place by cross-sectioning the rafters with 2x4s placed at a 3-inch clearance around the fixture. Cut the polystyrene board to fit around the fixture and inside the wood square you have just created.
Step 3: Install a Vapor Barrier
If you are installing insulation with a vapor barrier, make sure it faces the interior of the house. Another option for a vapor barrier is to take sheets of plastic and lay them between the ceiling joists. Then, using a staple gun, tack them to the sides of the joists.
Step 4: Apply the Insulation
Begin by cutting long strips of fiberglass to measure, and lay them in between the joists. Do not bunch or compress the material; this will reduce the insulative effect.
Considerations for Attic Flooring
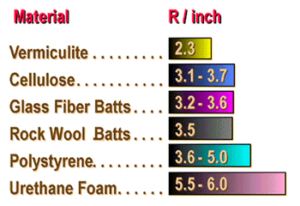
A second layer of insulation will make it easier to obtain the recommended R-value. In colder climates, use an R-value of 49 for adequate attic insulation. In warmer climates, use and R-value of 30. Fiberglass insulation has an R-value of roughly R-3 per inch of thickness; cellulose has an R-value of roughly R-4 per inch, but it doesn’t retain its R-value rating as well as fiberglass.
If an attic floor is in place, it will be easier to use a blower to add cellulose insulation into the spaces. The best way to achieve this is to carefully select pieces of the floor and remove them in a manner such that you will have access to all of the spaces in between the joists. Run the blower hose up into the attic. A helper can control the blower. Blow the insulation into the spaces between the joists, taking care not to blow insulation near electrical fixtures. Replace any missing flooring pieces.
Loose-fill insulation, either fiberglass or cellulose, is also a good option in cases where there is no attic floor. In such circumstances, you won’t need a blower; you can simply place the insulation between the joists by hand. You may also wish to even out the spread with a notched leveler
For more information Click Here
Home Run Inspections, LLC
Oklahoma: 405-905-9175
Info@HomeRunInspections.com
We Cover All the Bases!
Serving: Oklahoma City, Edmond, Yukon, Piedmont, Bethany, El Reno, Tuttle, Mustang, Moore, Norman, Midwest City, Del City, Choctaw, McCloud, Shawnee, Harrah, Newalla, Jones, and more.
Schedule Your Inspections Online at:
Click Here to Schedule Your Home Inspection Today!
Like us on FaceBook
Follow us on Twitter
Follow us on Instagra
#homeruninspections #homeinspectors #homeinspectorokc #homeinspectornearme #homeinspector #inspectionservices #realestateagent #realestateinvestment #OKCRealEstate #attic #atticinsulation #insulation

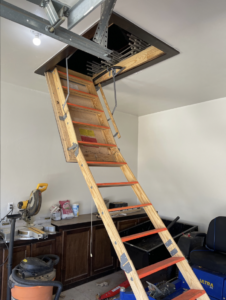
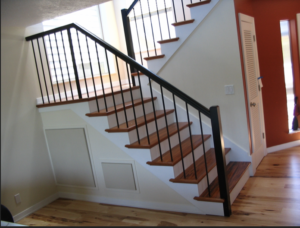 Stairs Maintenance
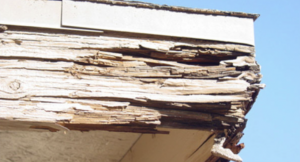
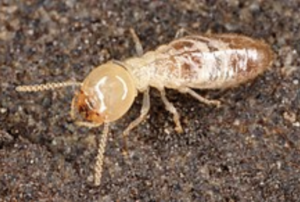 Subterranean termites are the most damaging insects of wood. Their presence is often hard to notice, and damage usually is found before the termites are seen. You should take measures to prevent infestations, which may require hiring a pest-control service.
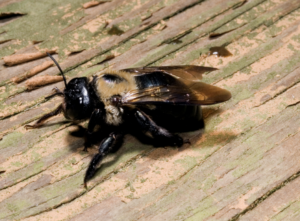
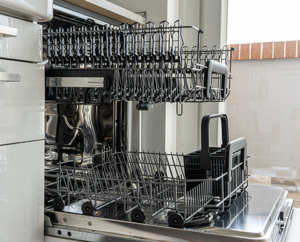 How Does a Dishwasher Work?