• Link to Mail
  • Link to Facebook
  • Link to X
  • Link to Youtube
  • Link to LinkedIn
  • Link to Yelp
  • OK: 405-905-9175
Home Run Inspections, LLC
  • Home
  • About Us
  • Services
  • What We Inspect
  • Your Report
  • For Agents
  • Testimonials
  • Blog
  • Contact Us
  • Schedule Now
  • Click to open the search input field Click to open the search input field Search
  • Menu Menu

Dishwashers

August 21, 2018/in Blog, Home Energy Efficiency, Home Safety, Homeowner Tools, On-Going Home Maintenance/by Scott Price

How Does a Dishwasher Work?
Dishwashers are labor-saving and water-conserving appliances that were first invented in the U.S. in the 1850s.  There are both portable units and permanently installed units that are found in most homes today.
Home Inspectors always inspect dishwashers. Permanently installed dishwashers rely on the home’s electrical and plumbing systems, which is why their proper operation and maintenance are critical to household safety and trouble-free use.

A dishwasher operates with sprayed water using multiple cycles of washing and rinsing, followed by drying, using hot, forced circulated air.  These cycles may be further distinguished according to length of cycle, power and temperature.

Dishwashers are plugged into a dedicated electrical receptacle at the back of the unit, and usually plumbed into the home’s hot water supply, although the cold water supply is also an option.  This assures that the dishwasher’s load is optimally washed and rinsed using the maximum recommended temperature range of between 130°  F and 170° F.

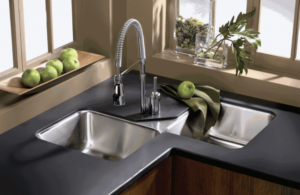
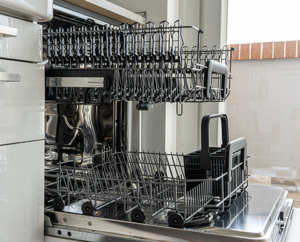
The dimensions of an average unit are 24×24 inches, although deluxe models may be wider and/or deeper to accommodate larger loads.  Its interior components are typically made of stainless steel and/or plastic, and the exterior door may be metal, enamel-covered metal, or having a wood or wood-like veneer to match the decor of the kitchen cabinets.

Use, Maintenance and Precautions
Dishwasher-safe glasses, cups, plates, bowls, pots, pans and utensils, as well as some ceramic-ware and cutlery, are loaded into pull-out racks and baskets.  They can be safely washed and rinsed in cycles that vary in intensity and length.

Many users rinse, soak or pre-treat cookware to remove solids and excess food waste before loading it in the dishwasher; this is a matter of personal preference, as well as how well the unit works on everyday and heavy-duty loads, although waste that cannot be adequately drained should be removed from dishware before the soiled items are loaded into the unit.

Dishwashers can also be used to effectively disinfect toothbrushes, infants’ plastic toys, formula bottles and synthetic nipples, and teething rings, as well as other household and personal hygiene items. However, extremely soiled items that come into contact with potentially hazardous or toxic materials, such as tools, gardening implements and the like, should not be washed in a dishwasher, as the toxic residue may not fully rinse out of the interior, which can contaminate future loads of dishware and utensils, as well as clog plumbing lines.

Soaps, pre-treaters and rinsing agents to prevent or eliminate water spots are available in a variety of costs, quality and effectiveness.  They also come in both powder and liquid form.  Regardless of the type of detergent used, it should be specifically for dishwasher use only, as other soaps can leave behind residue, as well as create excess foam and leaks.

Maintenance is relatively easy and can be done by running the unit through a hot-water cycle while it is empty, but this is only suggested following an especially dirty load where residue has not fully washed and drained for some reason.

Dishwashers should never be overloaded.  Loads should be distributed and racked such that cleaning will be effective.  It is recommended that plastic items be loaded into the unit’s top rack to avoid their coming into contact with hot elements in the unit’s bottom and then melting, or being jostled by the power of the sprayers and subsequently blocking them, which may prevent the water from reaching the unit’s entire load.

It is important to monitor the unit for failure to fully drain, as well as for leaks, excessive noise and movement, and burning smells, which can indicate a burned-out motor, an issue with the plumbing connected to the unit, or a problem with its original installation.  A qualified professional should evaluate a malfunctioning unit and perform any repairs

Home Run Inspections
405-905-9175
Info@HomeRunInspections.com
We cover all of the bases!

Serving:  Oklahoma City, Edmond, Yukon, Moore, Norman, Purcell, Midwest City/Del City, Bethany, El Reno, Shawnee, Harrah, and more.

Schedule your inspections now Online at:

Click to Schedule Now

Follow us on 

Like us on FaceBook
Follow us on Twitter

Follow us on Instagram: Instagram 


Kitchen Sink

August 18, 2018/in Blog, Home Safety, Homeowner Tools, On-Going Home Maintenance/by Scott Price

Sinks are a category of plumbing fixtures that includes kitchen sinks, service sinks, bar sinks, mop sinks and wash sinks. A sink is considered a different item than a lavatory (or a bathroom sink), although the terms are often used interchangeably. Sinks can be made of enameled cast-iron, vitreous china, stainless steel, porcelain-enameled formed steel, non-vitreous ceramic, and plastic materials.

Sink waste outlets should have a minimum diameter of 1-1/2 inches. Most kitchen sinks have an opening of 3-1/2 inches in diameter. A food-waste grinder has a standard opening of 3-1/2 inches, and so do most kitchen sink basket strainers. A strainer or crossbar should be provided to restrict the clear opening of the waste outlet.

Plumbing Requirements for Garbage Disposals
Food-waste grinders (also known as garbage disposals and disposers) are designed to grind foods, including bones, into small-sized bits that can flow through the drain line. Using them to dispose of fibrous and stringy foods, such as corn husks, celery, banana skins and onions, is not recommended because fibers tend to pass by the grinder teeth, move into the drain pipe, and cause drains to clog.

Water must be supplied to the grinder to assist during its operation in transporting waste. The water flushes the grinder chamber and carries the waste down the drainpipe. Blockage may result if the grinder is used without running the water during operation. Grinders should be connected to a drain of not less than 1-1/2 inches in diameter. Food-waste grinders are supplied with water from the sink faucet. They do not add to the load used to compute drainage pipe sizing. The drain size required for a grinder is consistent with that for a kitchen sink.

Plumbing Requirements for Dishwashers
The water supply to a residential dishwasher should be protected against backflow by an air gap or backflow preventer. The machine must be equipped with an integral backflow mechanism, or the potable water supply must have either a backflow preventer or an air gap. The discharge pipe from the dishwasher should be increased to a minimum of 3/4-inch in diameter. It should be connected with a wye fitting to the sink tailpiece. Before connecting to the sink tailpiece, the dishwasher waste line should rise and be securely fastened to the underside of the counter. The combined discharge from a sink, dishwasher, and waste grinder is allowed to discharge through a single 1-1/2-inch trap.

Maintenance Tips
Homeowners should take care not to overload the garbage disposal or the dishwasher, as this can lead to leaks and backups in the sink and the plumbing system.  A backup at the kitchen sink may mean that the garbage disposal is clogged, or the plumbing line has some obstruction that prevents proper drainage.  It’s important that homeowners understand the cause of the problem, as well as the proper way to repair it, before dismantling pipes under the sink.  The right size of fittings and replacement parts, as well as proper drainage (including slope and traps) will ensure that the sink will work as it should following a repair, which is why most maintenance issues are best left to professionals, unless the homeowner has the proper instruction, parts and tools available.

Home Run Inspections, LLC

Oklahoma:  405-905-9175

Info@HomeRunInspections.com

We Cover All the Bases!

Serving: Oklahoma City, Edmond, Yukon, Piedmont, Bethany, El Reno, Tuttle, Mustang, Moore, Norman, Purcell, Midwest City, Del City, Choctaw, McCloud, Shawnee, Harrah, Newalla, Jones, and more.

Schedule Your Inspections Online at:

Click Here to Schedule Now!

Like us on FaceBook

Follow us on Twitter

Follow us on Instagram


Roof Vents

August 15, 2018/in Home Energy Efficiency, Home Safety, On-Going Home Maintenance/by Scott Price

Roof Covering

Homeowners don’t generally want to climb on their roofs to check roof vents and its general condition unless they’ve experienced a major storm or other issue that prompts them to investigate.  This is smart because, as untrained non-professionals, homeowners are at greater risk for accidents and injuries than pros.

But it’s useful for homeowners to know what they’re likely to find if they do climb their roof. We recommend having  someone else climb it, such as an insurance adjuster or a home inspector. This should provide some idea of what components are there and what they do, as well as when those components are damaged and creating problems down below.

The proper term for anything that pokes out of the surface of the roof is known as a roof penetration.  Whether it’s a chimney, skylight or vent pipe, it falls under that category.  There are important elements related to the installation of all roof penetrations that prevent their premature deterioration. This is to ensure your roof and the structure under it stay dry and problem-free.

Vents Types

The most common type of roof penetration are vents. Every home has them. Vents are installed to expel gas or moisture of some sort from an appliance or area inside the house.  Vents are also called flues.

Here are the most common types and their functions:

  • Exhaust vents or mechanical ventilation allow the escape of damp air and odors from a bathroom, clothes dryer, and from the range above a stove in order to prevent the buildup of condensation.
  • Each plumbing drainpipe in the home is connected to a plumbing stack vent. This ensures the appliance’s proper drainage by preventing back-siphoning, which can pull noxious vapors and sewer gases back into the home.  One important aspect of their installation is that they should not be located with 3 feet of an openable window so that these gases don’t get sucked back into the home.
  • Vents installed in the attic space are known as roof vents or turtle vents. They release hot air that can build up inside the attic as a result of heat rising from the living space below.  Venting this hot air is important to prevent the premature deterioration of the roofing materials. This can overheat and lose adhesion or delaminate shingles.  It can also form condensation which can also affect wooden structural members and insulation.
  • Combustion vents are installed for fuel-burning appliances, such as a furnace, boiler, water heater, gas range, fireplace—any appliance that burns fuel for its operation, such as gas, propane, oil, wood, etc. They exhaust the toxic byproducts of combustion to the outdoors.

Vent Material

Vents can be made of galvanized steel, such as a dryer vent.  PVC is appropriate to use as plumbing stack vents, depending on the appliance. Some vents may have caps or hoods to prevent rainwater from entering them such as a dryer vent. There are also vent-like roof penetrations that are actually air intakes, such as for a furnace, which aid proper combustion.

Vents can be double-walled or single-wall, depending on their purpose.  Combustion vents tend to be double-walled.  Some vents serve multiple items or appliances, but they tend to be of the same type.  A vent that serves more than one plumbing fixture needs to be larger in order to move the gas at an appropriate rate.

Problems with Combustion Vents

If installed properly, vents tend to operate problem-free, but poor installation or materials can lead to issues, such as leaks, corrosion, and insufficient ventilation.  That’s when the problems can affect the living space and appliances below.  The most common issues occur with combustion vents.

To work effectively, a combustion vent has to draw adequately, which is the natural process that moves hot exhaust gases up and out the exhaust flue or vent. Another way to say it is that the vent needs to have a good draft. The effectiveness of the draft is influenced by several factors.

These factors include:

  • thermal buoyancy, which is the tendency of hot air to rise. The hotter the gas is, the faster it will rise;
  • unrestricted flow, which means that the exhaust flue can’t be too small or have too many bends, since these two things slow the flow; and
  • proper length. If a flue is too long, the gases will cool and condensation will form. Condensation can cause corrosion of the sheet metal exhaust flue, as well as the furnace’s components.

Vent Height 

An important factor in the quality of the draft is adequate clearance above the roof.  This generally means that the vent should follow either the manufacturer’s installation recommendations or the “2-10 Rule” required by most building code regulations for chimney terminations.  The 2-10 Rule states that combustion vents should terminate at least 2 feet above any part of the highest part of the roof, including the roof itself, within 10 feet.  For example, if a combustion vent is 3 feet away from a dryer vent on a flat roof, the combustion vent should be two feet higher than the dryer vent.  If a combustion vent is on the low part of a sloping roof, the vent must be 2 feet higher than the nearest point of the sloped roof that’s within 10 feet.  So, if you see a vent that doesn’t meet the 2-10 Rule, a qualified HVAC contractor may need to re-install a vent of the proper height.

White deposits on combustion vents or on the roof below them are evidence that excessive condensation has been forming. Causes include:

  • is too long;
  • has too many bends; or
  • has poorly sloped sections that slow the flow of exhaust gases.

If you see this condition on a roof, you should look for similar white deposits on the combustion appliance served by the vent. Poor venting can cause corrosion that may shorten the lifespan of that appliance.

Flashing for Vents

Flashing keeps moisture and the elements from entering the roof surface down the side of the vent.  Different types of vents require flashing that is appropriate for the type of vent installation, as well as of a compatible material so that it doesn’t cause galvanic corrosion or other issues that will cause the vent or flashing to deteriorate prematurely.  Flashing should be on top of roof shingles or below stone tiles. A good roofing contractor who specializes in your roof’s material will install it properly.

Of course, a leak in the attic, or any signs of rust or staining on the vent, flashing or roof is a sign of a problem.  If you do suspect a problem, your first call should be to your home inspector so that he can investigate it before you call a contractor.  Most contractors are honest, but since the contractor has something to sell, and it’s in his best interests to find a problem that he can charge you to fix.  Call your InterNACHI home inspector first; it’s his job to find the problem, not fix it

Home Run Inspections, LLC

Oklahoma:  405-905-9175

Info@HomeRunInspections.com

We Cover All the Bases!

Serving: Oklahoma City, Edmond, Yukon, Piedmont, Bethany, El Reno, Tuttle, Mustang, Moore, Norman, Purcell, Midwest City, Del City, Choctaw, McCloud, Shawnee, Harrah, Newalla, Jones, and more.

Schedule Your Inspections Online at:

Click Here to Schedule Today

Like us on FaceBook

Follow us on Twitter

Follow us on Instagram


Cracks in Masonry Walls

August 11, 2018/in Blog, Home Safety, On-Going Home Maintenance/by Scott Price

Exterior Wall Covering

Regardless of the type of cladding covering the exterior of homes, most homes’ foundations in Oklahoma City are built using a reinforcing metal structure covered by some kind of concrete or masonry.  Over time, cracks in masonry walls may develop.  If your home has a masonry foundation (including masonry walls), here are some things to know, especially if you notice the development of any defects, cracks, or moisture intrusion in your crawlspace or basement.

Every homeowner should occasionally check the exterior of their home and the foundation, especially if there have been severe weather or geological events, such as heavy rains, flooding, or seismic activity, or nearby construction or industrial work that creates noticeable vibration, such as roadwork, the installation of oil or gas wells or pipeline, etc.

Before looking at the exterior, it’s useful to know which walls are load-bearing and which are not. Usually, this can be done by examining the beams and joists in the basement, crawlspace or attic. Also, note whether the walls are solid masonry or masonry-cavity, non-structural brick, or stone veneer. The overall quality of the building’s construction, and often that of its neighborhood, will be a good indicator of the condition of your home’s masonry.

All exposed masonry should be inspected for the following:

  • cracking;
  • spalling, which is the chipping or flaking of concrete, bricks or other masonry when improper drainage or venting and freeze-thaw weather cycling exists;
  • bowing, which is the term used to describe vertical bulging;
  • sweeping, which is horizontal bulging;
  • leaning; and
  • mortar deterioration.

Masonry Cracks

Although masonry can deform elastically over long periods of time to accommodate small amounts of movement during freeze-thaw cycles, large movements can cause masonry cracking, which may appear along the mortar joints or through the masonry units.

Cracking can result from a variety of problems:

  • differential settlement of the foundation;
  • drying shrinkage (particularly in a concrete block foundation);
  • expansion and contraction due to ambient thermal and moisture variations;
  • improper support over door and window openings, which is the effect of freeze-thaw cycles;
  • the corrosion of iron and steel wall reinforcement;
  • differential movement between building materials;
  • the expansion of salts in the cement mixture;
  • efflorescence,  which is the white powder that forms on the surface of concrete/masonry walls as a result of water evaporation (and a cosmetic issue only); and
  • the bulging or leaning of walls.

Testing

Most common masonry wall cracks are caused by thermal or moisture expansion. Active cracks can be sealed with a flexible sealant.  Inactive cracks may be pointed, which is the process of filling joints between masonry units or bricks with mortar.  Some of this work should be undertaken by a masonry professional.

If there are evident or suspected problems, two methods of testing are sometimes useful for assessing masonry. This first test should be performed by a qualified masonry contractor.  Probe holes can be drilled through the joints or masonry units with a masonry bit and probed with a stiff wire (or a fiber optic camera) to determine a wall’s thickness and the adequacy of its mortar. The probe holes are then patched after the investigation has been completed.

A hammer test can be used to determine the structural soundness of masonry units and their bond to the mortar. In a hammer test, the masonry is tapped lightly with a hammer, and the resonance of the sound produced is evaluated. Individual bricks can be replaced and the mortar re-pointed, as damaged bricks cannot be repaired.  If re-pointing, the new mortar should be of the same composition as the existing mortar to prevent deterioration.

Historically Speaking

There may be a substantial difference in the masonry walls in buildings built during the last 40 to 50 years compared to those constructed earlier. Walls became thinner as designers began to more effectively exploit the compressive strength of masonry. This was done by using higher-strength masonry materials and mortars. But this change came at the expense of flexibility; as such, today’s masonry walls and foundations are often more brittle than their massive ancestors and, therefore, particularly susceptible to stress-induced damage.  As home inspectors we encourage homeowners to be vigilant with their homeowner maintenance plan by occasionally checking the condition of their home’s foundation, along with any masonry walls.

Home Run Inspections, LLC

Oklahoma:  405-905-9175

Info@HomeRunInspections.com

We Cover All the Bases!

Serving: Oklahoma City, Edmond, Yukon, Piedmont, Bethany, El Reno, Tuttle, Mustang, Moore, Norman, Purcell, Midwest City, Del City, Choctaw, McCloud, Shawnee, Harrah, Newalla, Jones, and more.

Schedule Your Inspections Online at:

Click Here to Schedule Inspection Today

Like us on FaceBook

Follow us on Twitter

Follow us on Instagram

#construction #homeruninspections #masonry #homeownership #homeinspection #homeinspector #realestateinvesting

Attic Access Pull-Down Stairs

August 5, 2018/2 Comments/in Blog, Home Energy Efficiency, Home Safety, On-Going Home Maintenance/by Scott Price

Attic Access Pull-Down Stairs
An attic pull-down ladder, also called an attic pull-down stairway or stairs, is a collapsible ladder that’s permanently attached to the attic floor. It’s used to access the attic without being required to use a portable ladder, which can be unstable, as well as inconvenient. They certainly make a home inspectors life easier.

Common Defects
In Oklahoma City, it’s typical for the home builder, rather than the home owner, to install the attic pull-down stairs.  As a home inspector we often find issues with these stairs. They rarely meet safety standards and are prone to a number of defects.

Some of the more common defective conditions include:

  • Cut bottom cord of structural truss. The homeowner may have cut through a structural member while installing a pull-down ladder, unknowingly weakening the structure. Structural members should not be modified without an engineer’s approval;
  • Fastened with improper nails or screws. Drywall or deck screws may be used instead of the standard 16d penny nails or ¼x3-inch lag screws. Nails and screws that are intended for other purposes may have reduced shear strength and may not support the pull-down ladder;
    fastened with an insufficient number of nails or screws. Manufacturers provide a certain number of nails with instructions that they all be used, and they do this for a good reason;
  • Lack of insulation. The attic hatch or door is not likely to be weatherstripped and/or insulated, which will allow air from the attic to flow freely into the living space of the home, and this will cause the heating or cooling system to run overtime. An attic hatch cover box can be installed to increase energy savings;
  • Loose mounting bolts, which is typically caused by age, although improper installation will hasten the loosening process;
  • Attic pull-down ladders that are cut too short. The stairs should reach the floor;
  • Attic pull-down ladders that are cut too long. This causes pressure at the folding hinge, which can cause breakage;
  • Improper or missing fasteners
  • Compromised fire barrier (when the attic and access are above an attached garage);
  • Attic ladder frame that is not properly secured to the ceiling opening; and
  • Closed ladder that is covered with debris, such as blown insulation or roofing material shed during roof work.
  • Cracked steps. This defect is a problem with wooden ladders.


Safety Tips:
If yours is a sliding pull-down ladder, there is a potential for it to slide down too quickly, which can lead to an injury. Always pull the ladder down slowly and cautiously.
Do not allow children to enter the attic unattended. The lanyard attached to the attic stairs should be short enough that children cannot reach it. Parents can also lock the attic ladder so that a key or combination is required to access it.
If possible, avoid carrying large loads into the attic. While a properly installed stairway will safely support an adult, it might fail if you’re carrying a very heavy load. Many trips can be made to reduce the total weight load, if possible.
Replace an old, rickety wooden ladder with a new one. The newer aluminum models are lightweight, sturdy and easy to install. If you do install a new ladder, follow the manufacturer’s instructions to the letter, and test the ladder’s operation before actually using it.

Click Here for More Information

Home Run Inspections, LLC

Oklahoma:  405-905-9175

Info@HomeRunInspections.com

We Cover All the Bases!

Serving: the Oklahoma City, Edmond, Yukon, Piedmont, Bethany, El Reno, Tuttle, Mustang, Moore, Norman, Midwest City, Del City, Choctaw, McCloud, Shawnee, Harrah, Newalla, Jones, and more.

Schedule Your Inspections Online at:

Schedule Your Inspection Here

Like us on FaceBook

Follow us on Twitter

Follow us on Instagra

#homeruninspections #homeinspectors #homeinspectorokc #homeinspectornearme #inspectionservices #realestateagent #realestateinvestment #OKCRealEstate


Attic Insulation

August 2, 2018/in Blog, Home Energy Efficiency, Home Safety, On-Going Home Maintenance/by Scott Price

Controlling Heat Movement

Heating and cooling costs can be slashed by up to 30% per year by properly sealing and having adequate attic insulation in the home. Insulating the attic should be a top priority for preventing heat loss because during cool seasons, as heat rises, a critical amount of heat loss from the living areas of the home occurs through an unfinished attic. During the summer months, heat trapped in the attic can reduce the home’s ability to keep cool, forcing the home’s cooling system to work overtime.

What to Check

As home inspectors we often see the lack of adequate ventilation in insulated attics is a common problem. Ensuring that there is a free flow of outside air from the soffits to the roof vents is key to a well-functioning insulation system. Look behind the baffles to see if there is any misplaced insulation obstructing the natural air flow, and check the roof vents to make sure that outside air is exhausting properly. Also, look for spots where the insulation is compacted; it may need to be fluffed out. If loose-fill insulation is installed, check for any thinly spread areas that may need topping up. Finally, look for dark spots in the insulation where incoming air is admitting wind-blown dust and moisture into the material. Any unintended openings or holes caused by weathering or pest damage should be repaired first.

Installing Attic Insulation

The objective in an attic insulation project is to insulate the living space of the house while allowing the roof to retain the same temperature as the outdoors. This prevents cold outside air from traveling through the attic and into the living area of the home. In order to accomplish this, an adequate venting system must be in place to vent the roof by allowing air flow to enter through soffit-intake vents and out through ridge vents, gable vents or louver vents.

If there is currently a floor in the attic, it will be necessary to pull up pieces of the floor to install the insulation. In this case, it will be easier to use a blower and loose-fill insulation to effectively fill the spaces between the joists. If you choose to go with blown-in insulation, you can usually get free use of a blower when you purchase a certain amount of insulation.

When installing fiberglass insulation, make sure that you wear personal protective equipment, including a hat, gloves, goggles and a face mask, as stray fiberglass material can become airborne, which can cause irritation to the lungs, eyes and exposed skin.

The process

Before you begin actually installing the insulation, there is some important preparation involved in order to ensure that the insulation is applied properly to prevent hazards and to achieve maximum effectiveness.

Step 1: Install Roof Baffles
Install polystyrene or plastic roof baffles where the joists meet the rafters order to maintain the free flow of outside air.

Step 2: Place Baffles Around Electrical Fixtures
Next, place baffles around any electrical fixtures (lights, electrical receptacles, etc.), since these may become hot while in use. Hold the baffles in place by cross-sectioning the rafters with 2x4s placed at a 3-inch clearance around the fixture. Cut the polystyrene board to fit around the fixture and inside the wood square you have just created.

Step 3: Install a Vapor Barrier
If you are installing insulation with a vapor barrier, make sure it faces the interior of the house. Another option for a vapor barrier is to take sheets of plastic and lay them between the ceiling joists. Then, using a staple gun, tack them to the sides of the joists.

Step 4: Apply the Insulation
Begin by cutting long strips of fiberglass to measure, and lay them in between the joists. Do not bunch or compress the material; this will reduce the insulative effect.

Considerations for Attic Flooring

A second layer of insulation will make it easier to obtain the recommended R-value. In colder climates, use an R-value of 49 for adequate attic insulation. In warmer climates, use and R-value of 30. Fiberglass insulation has an R-value of roughly R-3 per inch of thickness; cellulose has an R-value of roughly R-4 per inch, but it doesn’t retain its R-value rating as well as fiberglass.

If an attic floor is in place, it will be easier to use a blower to add cellulose insulation into the spaces. The best way to achieve this is to carefully select pieces of the floor and remove them in a manner such that you will have access to all of the spaces in between the joists. Run the blower hose up into the attic. A helper can control the blower. Blow the insulation into the spaces between the joists, taking care not to blow insulation near electrical fixtures. Replace any missing flooring pieces.

Loose-fill insulation, either fiberglass or cellulose, is also a good option in cases where there is no attic floor. In such circumstances, you won’t need a blower; you can simply place the insulation between the joists by hand. You may also wish to even out the spread with a notched leveler

For more information Click Here

Home Run Inspections, LLC

Oklahoma:  405-905-9175

Info@HomeRunInspections.com

We Cover All the Bases!

Serving: Oklahoma City, Edmond, Yukon, Piedmont, Bethany, El Reno, Tuttle, Mustang, Moore, Norman, Midwest City, Del City, Choctaw, McCloud, Shawnee, Harrah, Newalla, Jones, and more.

Schedule Your Inspections Online at:

Click Here to Schedule Your Home Inspection Today!

Like us on FaceBook

Follow us on Twitter

Follow us on Instagra

#homeruninspections #homeinspectors #homeinspectorokc #homeinspectornearme #homeinspector #inspectionservices #realestateagent #realestateinvestment #OKCRealEstate #attic #atticinsulation #insulation


Roof Maintenance

July 30, 2018/in Autumn Home Maintenance, Blog, Home Safety, Homeowner Tools, On-Going Home Maintenance/by Scott Price

Roof-Covering Maintenance

Although homeowners aren’t necessarily expected to climb on their roofs every season as part of regular home maintenance, there are some conditions that should be monitored to prevent roof damage and to help you get the longest life out of your roof-covering materials. Certain types of damage can lead to water and pest intrusion, structural deterioration, and the escape costly energy. A home inspector will call out these issues on a home inspection.

Weathering
Hail and storm damage, known as weathering, can weaken a roof’s surface even if you haven’t lost any shingles/shakes/slates following a storm. It’s the most common source of environmental damage for roofs. Strong, sustained winds can cause uplift to the edges of shingles and shakes, which can weaken their points of attachment and allow rainwater and melting snow to reach the roof’s underlayment. Wind can also send projectiles through the air, which can damage every surface of the home’s exterior, including the roof. In Oklahoma City especially, you should always inspect your roof after a heavy weather event, as far as it is practical to do so without taking any undue risks, to check whether you have lost any roof-covering materials, or if any parts look particularly weathered or damaged. A small fix now could prevent costly repairs later.

roof with tree damage

Tree Damage at Roof

Tree Damage
Tree damage results from wind-blown tree branches scraping against shingles and from the impact of falling branches blown by wind and/or because the nearby tree has dead branches that eventually break off and fall. Branches that overhang the roof should always be cut back to avoid damage from both abrasion and impact, and to prevent the accumulation of leaf debris on the roof, its valleys, and in the gutters, which will interfere with proper drainage and lead to pooling of rainwater and snowmelt. Of course, it’s especially important to make sure that tree limbs near the home’s roof and exterior are a safe distance away from utility and power lines. Tree-trimming is a type of homeowner maintenance task should be undertaken by qualified professionals, as it can lead to accidentally cutting off the service or power from an overhead line, being electrocuted by an energized line, being struck by an unsecured tree branch, falling off the roof or a ladder, and any number of similar mishaps that the homeowner is not trained to anticipate and avoid.

Animal Damage
Squirrels and raccoons (and roof rats in coastal regions) will sometimes tear through shingles and roof sheathing when they’re searching for a protected area in which to build nests and raise their young. They often attack the roof’s eaves first, especially on homes that have suffered decay to the roof sheathing due to a lack of drip edges or from problems caused by ice damming, because decayed sheathing is softer and easier to tear through. If you hear any activity of wildlife on your roof, check inside your attic for evidence of pest intrusion, such as damaged insulation, which pests may use for nesting material. Darkened insulation generally indicates that excess air is blowing through some hole in the structure, leading the insulation to become darkened by dirt or moisture.

Biological Growth
Algae, moss and lichen are types of biological growth that may be found on asphalt shingles under certain conditions. Some professionals consider this growth destructive, while others consider it merely a cosmetic problem. Asphalt shingles may become discolored by both algae and moss, which spread by releasing airborne spores.

Almost all biological growth on shingles is related to the long-term presence of excess moisture, which is why these problems are more common in areas with significant rainfall and high relative humidity. But even in dry climates, roofs that are shaded most of the time can develop biological growth.

What we commonly call “algae” is actually not algae, but a type of bacteria capable of photosynthesis. Algae appears as dark streaks, which are actually the dark sheaths produced by the organisms to protect themselves from the ultraviolet radiation of the sun. When environmental conditions are right, the problem can spread quickly across a roof.

Algae can feed on mineral nutrients, such as the calcium carbonate in limestone used as asphalt shingle filler. Calcium carbonate also causes asphalt to retain moisture, which also promotes algae growth, so shingles with excessive filler may be more likely to suffer more algae growth. The rate of filler consumption is slow enough that it’s not generally considered a serious problem.

Algae attach to the shingle by secreting a substance that bonds it tightly to the surface. Growth can be difficult to remove without damaging the roof. The best method is prevention. Algae stains can sometimes be lightened in color by using special cleaners. Power-washing and heavy scrubbing may loosen or dislodge granules. Chemicals used for cleaning shingles may damage landscaping. Also, the cleaning process makes the roof wet and slippery, so such work should be performed by a qualified professional.

Moss is a greenish plant that can grow more thickly than algae. It attaches itself to the roof through a shallow root system that can be freed from shingles fairly easily with a brush. Moss deteriorates shingles by holding moisture against them, but this is a slow process. Moss is mostly a cosmetic issue and, like algae, can create hazardous conditions for those who climb on the roof.

Lichens are composite organisms consisting of a fungus and a photosynthetic partner, such as green or blue-green algae. Lichens bond tightly to the roof, and when they’re removed from asphalt shingles, they may take granules with them. Damage from lichen removal can resemble blistering.

“Tobacco-juicing” is the brownish discoloration that appears on the surface of shingles, under certain weather conditions. It’s often temporary and may have a couple of different causes. After especially long periods of intensely sunny days, damp nights and no rain, water-soluble compounds may leach out of the asphalt from the shingles and be deposited on the surface. Tobacco-juicing may also appear under the same weather conditions if the air is especially polluted. Tobacco-juicing won’t harm asphalt shingles, although it may run down the roof and stain siding. Although it’s more common in the West and Southwest, it can happen anywhere that weather conditions are right. You can spray-wash or paint the exterior of the home to remove tobacco-juicing.

Your InterNACHI inspector should investigate signs of roof damage or deterioration before you call a roofing contractor. That way, you’ll know exactly what types of problems should be addressed before you break out the checkbook for repairs

Home Run Inspections, LLC

Oklahoma:  405-905-9175

Info@HomeRunInspections.com

We Cover All the Bases!

Serving the Oklahoma City metro and surrounding areas including Edmond, Yukon, Piedmont, Bethany, El Reno, Tuttle, Mustang, Moore, Norman, Midwest City, Del City, Choctaw, McCloud, Shawnee, Harrah, Newalla, Jones, and more.

Schedule Your Inspections Online at:

Schedule Your Inspection today

Like us on FaceBook

Follow us on Twitter

Follow us on Instagram

#roof #roofmaintenance #homeruninspections #homeinspectors #homeinspectorokc #homeinspectornearme #homeinspector #inspectionservices #realestateagent #realestateinvestment #OKCRealEstate


Furnace Filter Maintenance

July 27, 2018/in Blog, Home Energy Efficiency, Home Safety, On-Going Home Maintenance/by Scott Price

Regular Home Maintenance

Part of responsible homeownership includes, of course, regular home maintenance.  And there are some tasks that, if deferred, can lead to a home system that’s inefficient and overworked, which can result in problems and expenses.  We often see this on our home inspections. One such task is changing the air filter of the home’s HVAC system. Air Filter Maintenance is simple and inexpensive, and taking care of it at least every three months can mean the difference between optimum comfort and avoidable repairs.

What Can Go Wrong
Most homes have some sort of furnace or heat pump, and many of those homes (especially newer ones) have combined heating, ventilation and air-conditioning or HVAC systems.  Each type uses some type of air filter or screen to prevent larger airborne particles (up to 40 microns) from entering the system and clogging sensitive machinery.  A system that has a dirty filter can suffer from pressure drop, which can lead to reduced air flow, or “blow-out,” resulting in no air infiltration at all.  Any of these conditions can cause the system to work harder to keep the home warm or cool (depending on the season and the setting).  And any mechanical component that has to work harder to run efficiently puts undue stress on the whole system, which can lead to premature failure, resulting in repair or replacement.

Also, a dirty filter that’s exposed to condensation can become damp, which can lead to mold growth that can be spread throughout the home by the HVAC system.  This can lead to serious health consequences, not to mention a compromised unit that will likely require servicing and may require replacement, depending on the severity of the moisture problem.

Types of Filters
Most HVAC and furnace filters are disposable.  They are made of biodegradable paper or similar media, and shaped in cells, screens or fins designed to trap as much airborne debris as possible.  Filters can typically be purchased in economical multi-packs, and there are many types that will fit different models of furnace/HVAC units.  It’s important to use the appropriate filter for your unit; using the wrong filter that doesn’t fit the unit properly can create the same types of problems as having a dirty filter.  Your HVAC installer can show you where the filter goes and how to remove the old one and install a new one.  Your unit may also have an affixed label with directions for easy filter replacement.

How Often?
Your HVAC or furnace technician should service your unit once a year.  Because a furnace/HVAC unit contains moving parts, it’s important that belts are not cracked and dry, ventilation ductwork is not gapped, cracked or rusted, and components, such as coils and fans, are clog-free and adequately lubricated for unimpeded operation.  This sort of evaluation is best left to the professional, unless you’ve had the appropriate training.

The filter of the unit, especially if it’s an HVAC unit that will tend to get nearly year-round use, should be changed by the homeowner at least every three months, but possibly more often.

Check your filter’s condition and change it once a month if:

  • You run your unit six months a year to year-round.
  • You have pets.  Pet dander can become airborne and circulate through the home’s ventilation system just as typical household dust does.
  • You have a large family.  More activity means more household dust, dirt and debris.
  • You smoke indoors.
  • You or someone in your household suffers from allergies or a respiratory condition.
  • You live in a particularly windy area or experience high winds for extended periods, especially if there are no nearby shrubs or trees to provide a natural windbreak.
  • You live in an area prone to or having recently experienced any wildfires.  Airborne ash outdoors will eventually find its way indoors.
  • You have a fireplace that you occasionally use.
  • You live on a working farm or ranch.  Dust and dirt that gets kicked up by outdoor work activity and/or large animals will be pulled into the home’s ventilation system, especially through open windows.
  • You have a large garden.  Depending on its size and how often you work it, tilling soil, planting, pulling weeds, using herbicides and pesticides, and even watering mean that dirt, chemicals and condensation can be pulled into your home’s ventilation system.
  • There is construction taking place around or near the home.  You may be installing a new roof or a pool, or perhaps a neighbor is building a home or addition.  Even if the activity is only temporary, dust and debris from worksites adjacent to or near the home can be sucked into the home’s ventilation system, and this increased activity can tax your HVAC system.

Change the filter immediately if:

  • The filter is damaged.  A damaged filter won’t work as intended.
  • The filter is damp.  A filter affected by moisture intrusion, system condensation, or even high indoor humidity can quickly become moldy and spread airborne mold spores throughout the home via the ventilation system.
  • There is evidence of microbial growth or mold on the filter.  Mold spores already infiltrating the home via the HVAC system are not only bad for the unit itself, but they can pose a health hazard for the family, ranging from an irritated respiratory system to a serious allergic reaction.

Tips on Changing the Filter

  • Turn off the unit before replacing the filter.
  • Use the right sized filter for your unit.
  • Follow the directions for your unit to make sure you’re installing the filter properly.  For example, many filters have different colors for the front and back (or upstream and downstream flow) so that they’re not installed backwards.
  • Make sure there aren’t any gaps around the filter frame.  If this is the case, you may have the wrong size filter, or the filter itself may be defective or damaged.
  • Use a rag to clean up any residual dust before and after you replace the filter.
  • Securely replace any levers, gaskets and/or seals.
  • Turn the unit on and observe it while it’s operating to make sure the filter stays in place.
  • Note the date of filter replacement in a convenient location for the next time you inspect it.  A filter that becomes dirty enough to change within a short period of time may indicate a problem with the unit or ventilation system, so monitoring how often the filter requires changing is important information for your technician to have.

Call a technician for servicing if:

  • Your unit fails to turn back on.
  • The fan is slow, making an excessive noise, or the fins are bent.
  • The coils are excessively dusty or clogged.
  • You notice moisture intrusion from an unknown source anywhere in the system.

Homeowners who take care of the easy task of changing their HVAC filter can help prevent system downtime and avoidable expenses. This is an easy way to keep their families living and breathing comfortably.  Your InterNACHI inspector can provide more useful tips and reminders during your Annual Home Maintenance Inspection

Home Run Inspections, LLC

Oklahoma:  405-905-9175

Info@HomeRunInspections.com

We Cover All the Bases!

Serving the Oklahoma City metro and surrounding areas including Edmond, Yukon, Piedmont, Bethany, El Reno, Tuttle, Mustang, Moore, Norman. We also provide services in Midwest City, Del City, Choctaw, McCloud, Shawnee, Harrah, Newalla, Jones, and more.

Also Now Serving the Florida Panhandle metro areas including Destin, Fort Walton Beach, Okaloosa Island, Miramar Beach, Santa Rosa Beach.  We also provide inspections in Niceville, Shalimar, Freeport, Crestview, DeFuniak Springs, Panama City Beach, and more.

Schedule Your Inspections Online at:

Schedule Your Inspection

Like us on FaceBook

Follow us on Twitter

Follow us on Instagra

#homemaintenance #filter #furnacefilter #hvac #homeruninspections #homeinspectors #homeinspectorokc #homeinspectornearme #inspectionservices #realestateagent #realestateinvestment #OKCRealEstate


Preventing Water in Basements

July 24, 2018/in Blog, Home Energy Efficiency, Home Safety, On-Going Home Maintenance/by Scott Price

In Oklahoma City, the biggest concern for homeowners related to their basement and/or crawlspace area is unwanted moisture intrusion.  This can be the result of several factors, which is why homeowners should occasionally check these areas. Preventing water in basements should be job #1 for the home owner.

The basement is typically the area of a home most at risk for water damage because it’s located below grade and surrounded by soil.  Soil releases the water it has absorbed during rain or when snow melts, and the water can end up in the basement through cracks.  Water can even migrate through solid concrete walls via capillary action, which is a phenomenon whereby liquid spontaneously rises in a narrow space, such as a thin tube, or via porous materials.  Wet basements can cause problems that include peeling paint, toxic mold contamination, building rot, foundation collapse, and termite damage.  Even interior air quality can be affected if naturally occurring gases released by the soil are being transmitted into the basement.

Properly waterproofing a basement will lessen the risk of damage caused by moisture or water.  Homeowners should be aware of what they can do to keep their basements and crawlspaces dry and safe from damage.

Prevent water entry.
You can help prevent water from entering the basement by ensuring that it’s diverted away from the foundation.  Poor roof drainage and surface runoff due to gutter defects and improper site grading may be the most common causes of a wet basement.

Here are some measures to use to divert water away from the foundation:

  • Install and maintain gutters and downspouts so that they route all rainwater and snow melt at least 10 feet away from the foundation to prevent pooling near the exterior walls.  At the point where water leaves the downspout, it should be able to flow freely away from the foundation instead of back toward it, and it should not be collecting in standing puddles.  A backsplash and diverter can help with this.
  • The finish grade should be sloped away from the building for 10 to 15 feet.  Low spots that may lead to water pooling near the foundation should be re-graded and evened out.
  • Shallow ditches called swales should be dug if one or more sides of the home face an upward slope.  A swale should slope away from the home for 10 to 15 feet, at which point it can empty into another swale that directs water around to the downhill-side of the property, leading it away from the foundation.

Repair all cracks and holes.
There are several causes of cracks and holes that permit moisture intrusion.  Poor workmanship during the home’s construction is one factor.  Water pressure from the outside can also build up, forcing water through the walls.  The house may have settled, causing cracks in the floor or walls.  As home inspectors we see this all the time. It’s important to repair all cracks and small holes to prevent leaks and floods.  Any large cracks or holes should be evaluated by a professional after consulting with your InterNACHI home inspector.

Here are some steps to take if you suspect that water is entering the basement through cracks or holes:

  • Examine the basement for holes and cracks and for moisture, leaks and discoloration.
  • A waterproof mixture of epoxy and latex cement can be used to fill small hairline cracks and holes.
  • Any cracks larger than about 1/8-inch should be filled with mortar made from one part cement and two parts fine sand, with just enough water to make a fairly stiff mortar.  It should be pressed firmly into all parts of the larger cracks and holes to be sure that no air bubbles or pockets remain.  As long as water is not being forced through the basement walls due to outside pressure, the application of mortar with a standard trowel will be sufficient if special care is taken to fill all cracks completely.
  • If water is being forced through by outside pressure, a slightly different method of patching can be used, involving chiseling out the mouth the crack along its length and cutting a dovetail groove, which is then filled with mortar.  You may wish to defer this type of repair to a masonry professional.
  • Sodium silicate is a water-based mixture that will actually penetrate the substrate by up to 4 inches.  Concrete, concrete block and masonry include lime as a natural component, which reacts with the sodium silicate to produce a solid, crystalline structure that fills in all the microscopic cracks, holes and pores.  No water vapor or gas will be able penetrate via capillary action because the concrete and masonry have now become harder and denser from the sodium silicate.  It is an alkaline substance and, as such, can burn the skin and eyes on contact.  Inhalation can also cause respiratory irritation.  All surfaces receiving this treatment must be prepared, and the several required applications must be thorough.  These are all reasons that this type of work should be performed by a trained professional.

Always have any large cracks evaluated by your InterNACHI inspector before undertaking any repairs yourself or hiring a professional, and check your basement and crawlspace regularly for moisture intrusion.  Adding a De-Humidifier and or a Sump Pump can really be beneficial as well.

Home Run Inspections, LLC

Oklahoma:  405-905-9175

Info@HomeRunInspections.com

We Cover All the Bases!

Serving: Oklahoma City, Edmond, Yukon, Piedmont, Bethany, El Reno, Tuttle, Mustang, Moore, Norman, Midwest City, Del City, Choctaw, McCloud, Shawnee, Harrah, Newalla, Jones, and more.

Schedule Your Inspections Online at:

Schedule Your Home Inspection

Like us on FaceBook

Follow us on Twitter

Follow us on Instagram

#basement #basements #crawlspace #moisture #homeruninspections #homeinspectors #homeinspectorokc #homeinspectornearme #inspectionservices #realestateagent #realestateinvestment #OKCRealEstate

Radon

July 21, 2018/in Blog, Home Safety/by Scott Price

What is it?

Radon is a cancer-causing, radioactive gas. You cannot see, smell or taste. But, it still may be a problem in your home. Although it is a naturally occurring gas in our environment, it is also the second leading cause of lung cancer deaths in the U.S., according to the U.S. Surgeon General. Nearly one out of every 15 homes is estimated to have elevated levels. The Surgeon General and the U.S. Environmental Protection Agency recommend testing all houses. Millions of Americans have already tested their homes for this gas, and you should, too.

Let your InterNACHI inspector test your home.

You cannot predict radon levels based on state, local or neighborhood radon measurements. Do not rely on radon test results from other homes in the neighborhood to estimate the radon level in your own home. Homes that are next to each other can have different radon levels. Carbon Monoxide Detectors and other common devices in homes do not pick up this gas. The only way to find out what your home’s radon level is have a Radon test performed.  Your InterNACHI inspector uses special interference-proof air-canister testing devices that will measure the radon levels in different areas of the home over a limited period of time, which will help determine whether installing a mitigation system is recommended.  A radon mitigation system can aid in continuously and automatically filtering outdoor ground air that enters the home, which will help reduce your home’s radon level.

Water Contamination

If the results of your Indoor Air Quality test show elevated levels of contaminants and your water comes from a private well, have your inspector test your water as well. The devices and procedures for testing  your home’s water supply are different from those used for measuring levels in indoor air. If your water tests positive, this can add to your risk of exposure because the radon can be released into the air during showering and while performing household tasks using water.

Home Run Inspections, LLC

Oklahoma:  405-905-9175

Info@HomeRunInspections.com

We Cover All the Bases!

Serving:  Oklahoma City, Norman, Yukon, Edmond, Piedmont, Bethany, El Reno, Tuttle, Mustang, Moore, Norman, Midwest City, Del City, Choctaw, McCloud, Shawnee, Harrah, Newalla, Jones, and more.

Schedule Your Inspections Online at:

Schedule Your Inspection Today

Like us on FaceBook

Follow us on Twitter

Follow us on Instagra

#homeruninspections #homeinspectors #homeinspectorokc #homeinspectornearme #inspectionservices #realestateagent #realestateinvestment #OKCRealEstate


Page 3 of 8‹12345›»

Pages

  • About Us
  • Blog
  • Contact Us
  • For Agents
  • Home
  • Services
  • Testimonials
  • Thank You!
  • What We Inspect
  • Your Report

Categories

  • Autumn Home Maintenance
  • Blog
  • Holidays
  • Home Energy Efficiency
  • Home Inspections
  • Home Safety
  • Homeowner Tools
  • Inspection Day
  • On-Going Home Maintenance
  • Perks
  • Spring Home Maintenance
  • Summer Home Maintenance
  • Uncategorized
  • Winter Home Maintenance

Archive

  • January 2023
  • November 2022
  • October 2022
  • August 2022
  • February 2022
  • January 2022
  • July 2021
  • March 2021
  • February 2021
  • January 2021
  • February 2020
  • January 2020
  • December 2019
  • November 2019
  • October 2019
  • August 2019
  • September 2018
  • August 2018
  • July 2018
  • February 2018
  • November 2017
  • October 2017
  • August 2017
  • July 2017
  • June 2017
  • May 2017
  • April 2017
  • March 2017
  • February 2017
  • January 2017
  • December 2016
  • November 2016
  • October 2016
  • September 2016
  • August 2016
  • July 2016
  • June 2016
  • May 2016
  • April 2016
  • March 2016
  • February 2016
  • January 2016
  • December 2015
  • November 2015

Home Run Inspections, LLC

We are an All-Star Team of Professional Inspectors providing Excellence in Inspection Services to Help You Assess & Maintain the Value of Your Real Estate Investments.

Call Now: (405) 905-9175

Info@HomeRunInspections.com

Oklahoma Service Areas

Proudly providing inspection services to the OKC metro and surrounding areas from Guthrie to Purcell, El Reno to Shawnee, and everything in-between.

Oklahoma Service Areas

Certified Master Inspector

Verify This Certified Master Inspector
© Copyright 2021 Home Run Inspections, LLC - Website by Spectora
  • Link to Mail
  • Link to Facebook
  • Link to X
  • Link to Youtube
  • Link to LinkedIn
  • Link to Yelp
Scroll to top Scroll to top Scroll to top